This project is a scenario-based, xAPI-enabled eLearning solution. I designed it to help software engineering managers give constructive performance feedback to junior software engineers.
Experience the Project
Software engineering managers regularly struggle to give constructive feedback to junior engineers on their teams. This is even more problematic when the junior engineers are working on challenging projects.
When faced with stretch assignments, junior engineers often have knowledge and skill gaps that could severely hinder their progress.
To tackle such a challenge, junior engineers need open conversations with their managers. The managers should help them work through their struggles and identify an actionable plan to move forward.
This is where constructive feedback comes into play. Constructive feedback is a two-way dialogue, resulting in effective communication and forward progress. "The most basic skill required for a competent manager," according to Empowered: Ordinary People, Extraordinary Products (2021)," is the willingness and ability to provide honest, timely, and constructive feedback to employees."
However, it isn't easy to give constructive feedback. Managers may overlook the significance of this type of feedback, or they may lack the skillset altogether. When constructive feedback is missing, some immediate consequences follow. The feedback ends up being too vague. There are no clear goals or expectations established. Or the feedback is loaded with too much information, and no priorities are given. Finally, the feedback may be one-sided or biased, and this may diminish the recipient’s sense of their accomplishments and growth.
There are long-term, negative consequences for not having constructive performance feedback. Without effective communication like this, it’s hard to make progress and projects can get delayed. The trust between the manager and the junior engineers can also diminish, which leads to turnover.
After witnessing how severe this problem was, I began designing a learning solution to the managers’ knowledge and skill gaps. After interviewing a cross-functional team of subject matter experts (SMEs) and employees, including engineering managers, software engineers, and developers, I decided to design a scenario-based, xAPI-enabled eLearning experience. This solution is ideal because:
1. The ability to give constructive feedback is a soft skill that requires intentional practice to improve. It's hard to gain this skill by memorizing raw information. The eLearning experience that I propose will empower software engineering managers and tech leads through concise, low-stakes batches of practice activities based on real-life scenarios.
2. The eLearning solution is cost-effective, data-driven, flexible, scalable, and customizable.
3. The eLearning solution facilitates the best practices by providing further resources. In the Review and Resources page, I offered templates for giving constructive performance feedback.
At the preparation phase, I interviewed a cross-functional team of subject matter experts (SMEs) and learners, including software engineers, managers, and tech leads in the US. By preparing and sending my questions well in advance and allowing them to respond in their preferred way (e.g., video chat, phone call, email, message), I was able to collect feedback very effectively and conducted in-depth conversations with them.
In those conversations, my SMEs shared with me examples of performance feedback, articles, books, and podcasts on this topic. These rich resources enabled me to promptly start a need analysis for this project. Inspired by Michael Allen's Successive Approximation Model, I started the iterative design and development processes after finishing the need analysis.
During the iterative design phase, I created an action map and a text-based storyboard.
Guided by Cathy Moore's Action Mapping, I defined the performance problem and identified the high-priority actions. These actions would be the ones that we need managers to perform while delivering constructive feedback.
While I was refining the action map, I started to sketch prototype activities. Once the action map was finished, I quickly dived into the text-based storyboard.

The text-based storyboard is one of my favorite parts of the design process. I thoroughly enjoyed translating ideas in the action map into a fully fleshed-out story. My academic training in mathematics and philosophy, public speaking, and research skills gives me a strong foundation to write compelling scenarios.
Having in-depth conversations with my SMEs also helped me create realistic distractors, ideal choices, good results, and bad consequences for each of the actions that we were targeting. Reading books—such as The Elegant Puzzle: Systems of Engineering Management--broadened my understanding of the performance problem.
Making the writing crisp and conversational was extremely fulfilling. I always strive to write concise sentences and present our experiences through clear, powerful narratives. I also decided to write the scenarios in a gender-neutral language—specifically, using the gender-neutral pronoun they/them and gender-neutral names. Similar to the field of mathematics and philosophy, the field of engineering is highly gender-specific. By intentionally making the narrative more inclusive, I am hoping that learners can be immersed in a less bias-induced, more thoughtful learning experience.
During the iterative design phase, I created visual mockups, visual storyboards, and interactive prototypes.
In the beginning, I used index cards to sketch the basic structure and the major parts of the project. This allowed me to get a full picture of the workflow and organize the process of visual mockups early on.

After creating the index cards, I dived into the process of making visual mockups. In this process, I made several decisions intentionally and carefully.

Guided by a minimalist design style, I finalized the main color scheme and focused my time on incorporating data-driven and user-friendly functionalities into my design.

Specifically, I designed a speech bubble icon. Whenever a user clicks the icon on any given page, a new page shows up. This option enables users to share their feedback, and they do not have to wait until the last page to submit their feedback.

While creating the visual mockups, I was simultaneously writing and updating my visual storyboard.

My prototyping process started early. After the needs analysis was done, I used Articulate Storyline 360 to create the interactive prototype, which I planned out visually in Adobe XD beforehand.
When developing the interactive prototype, I worked on the functionality, user experience, and design aesthetics. I improved these aspects through each iteration. The initial version included only a few slides, and I added more slides as I received and applied feedback.
After getting very thoughtful feedback from my SMEs and a group of instructional designers, I worked on fixing issues and errors in the prototype. For instance, I removed the voiceover on the mentor character. This practice really helped me understand when to use narration and when to avoid it.

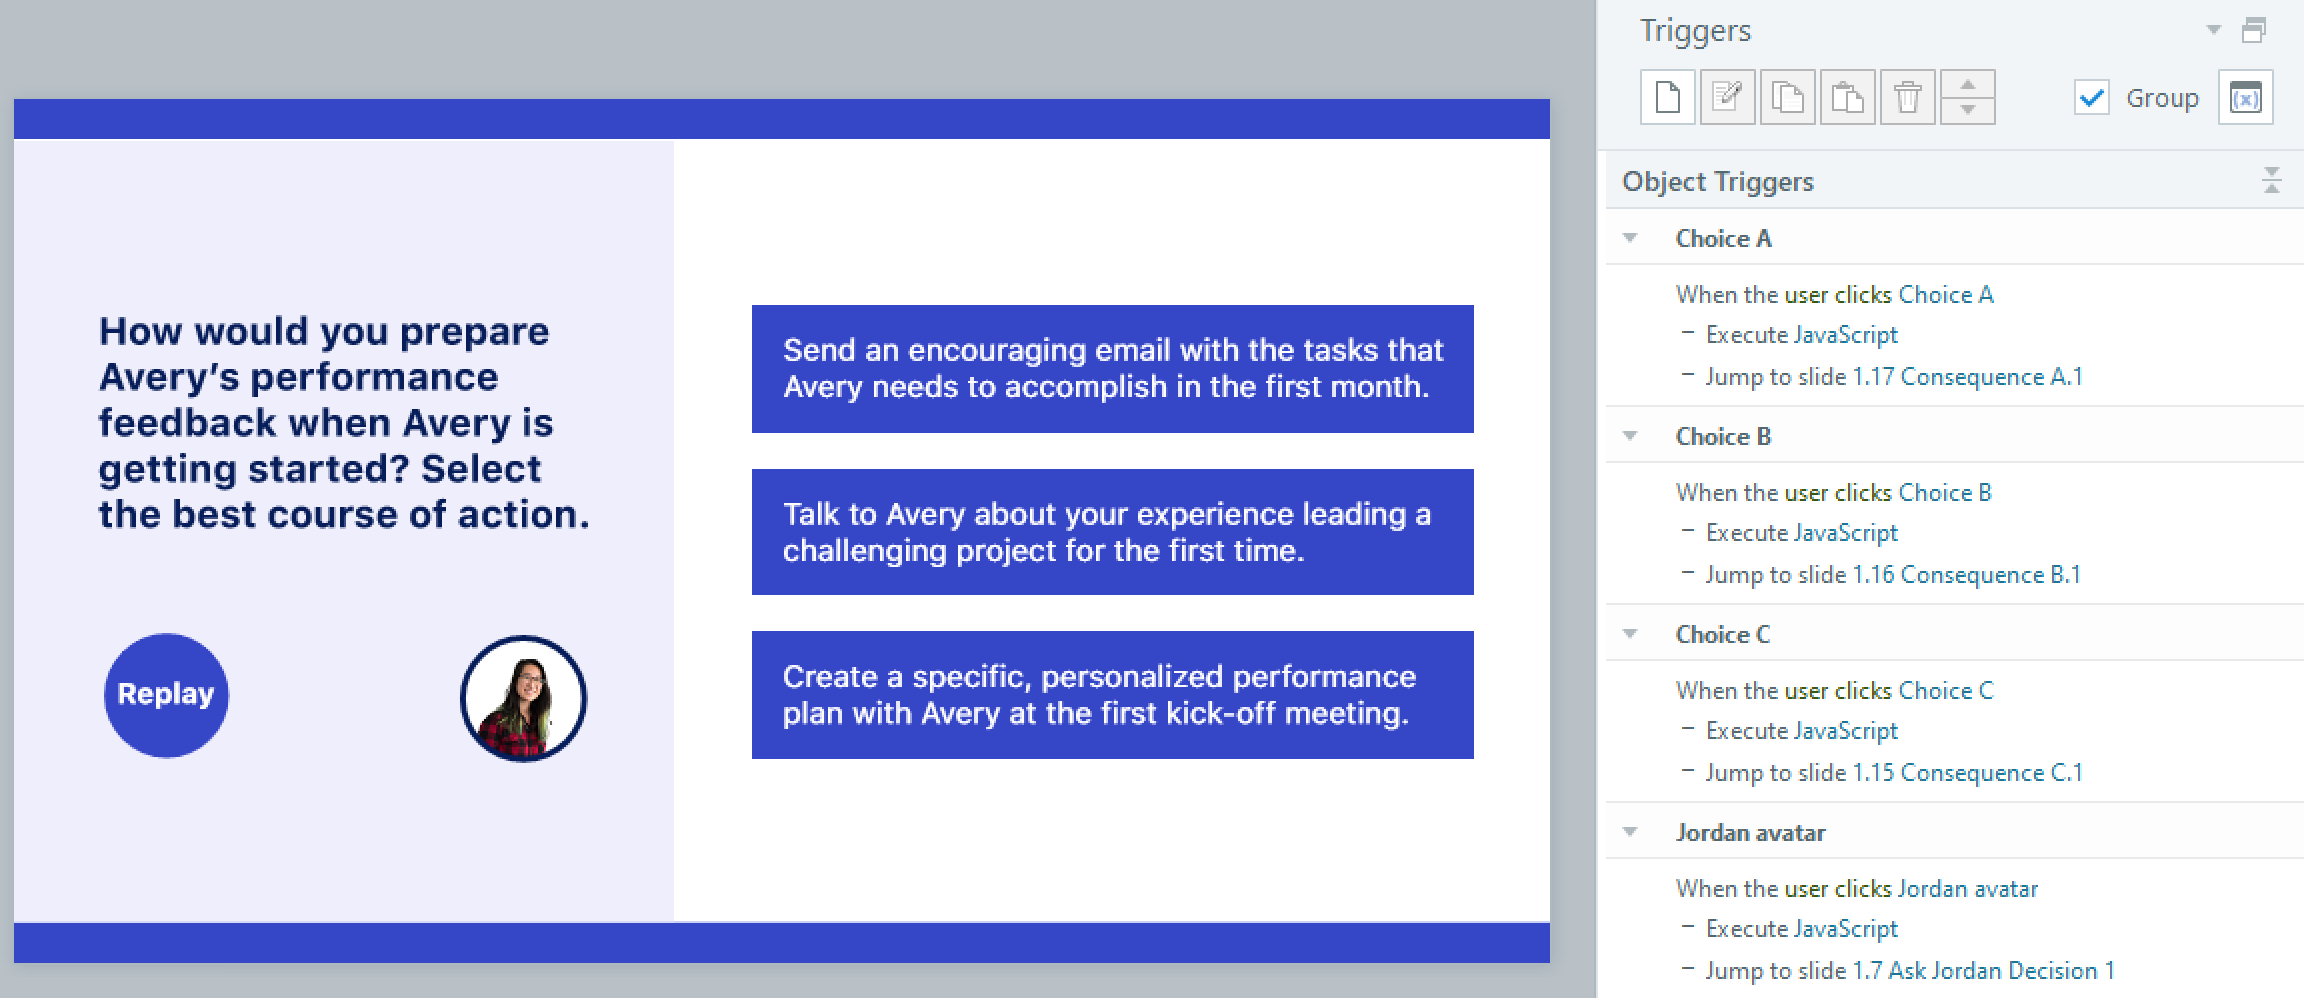
In the second iteration, I set up triggers and implemented xAPI throughout this project. I also tested the functionality of the triggers and xAPI statements. This iteration also prepared me to receive learner performance data later on.

In the third iteration, I focused on user experience and design aesthetics. For example, I kept buttons’ changes of states consistent and making different consequence and outcome pages visually distinct. I also maintained a clean layout for each page after adding a progress bar.


After collecting and applying feedback from the prototype, I moved the project into full development. Since the storyboard and prototype were already approved, completing the project was a relatively straightforward task.
xAPI statements are implemented in the project in order to collect learner performance data and use the data to improve the learning experience.

Activities: A learner’s activities in the scenario are recorded through xAPI statements. For instance, each time a learner enters the scenario, an xAPI statement, specified by the verb enter, is generated and sent to the Learning Record Store (LRS). Different activities, such as view the mentor’s advice on a question, choose an answer to a question, and download the templates, are specified and recorded in the LRS.

This data identifies what activities a learner goes through, what answers they choose, which questions they consult with the mentor, which questions they complete, and whether or not they download the templates. As the xAPI statements are populated in the LRS, they provide insight into refining specific answers, the mentor’s advice, and the templates.
Duration: A learner’s time spent on each question and the whole scenario is recorded. The data on time duration can help identify which question learners might find more challenging compared to other questions and whether or not a learner reaches the end of the scenario.

Score: A learner’s performance is measured by their score on each question and the whole scenario. This data provides further insight into what questions learners struggle with and how to improve mentor’s advice.

I conducted user acceptance testing with SMEs, stakeholders, and a small pool of learners. The feedback consisted of small revisions of specific pages and the templates. After the testing was done, the scenario was launched and sent to all relevant parties.
The process of creating this project has given me important takeaways.
Sometimes, appealing design does not perfectly align with user experience. In one of the prototypes, there was a Sign-In Page, and it requested users to enter their name and a valid email address. The page was clean, straightforward, and aesthetically appealing. It also had all the relevant JavaScript codes and triggers in place. A user’s name and information and interactions in the scenario can be captured and sent to the LRS.

However, after discussing with several SMEs and stakeholders, I decided to remove this page and create a random actor for the xAPI statements. A user would not be required to enter their name and email information. Instead, they will be assigned a random user ID. Their interactions in the scenario will still be captured in the LRS. Removing the Sign-In page allows users to enter the scenario swiftly. This decision is hard, but intentional. It is crucial to prioritize user experience over appealing design in this case.
I designed an icon in a dropdown menu that allowed users to share the scenario on social media with their network. However, the current Articulate Storyline does not have this functionality or facilitate this function through custom xAPI statements.

This attempt motivated me to think deeper about what built-in tools can be added to an authoring tool and what new technology and techniques can be created in the future.